Scheduled recording
To create an ingest job for scheduled recording, use the advanced ingest job settings menu and proceed as follows:
-
Select the window of the ingest channel to be used.
-
To make sure that the desired input signal is present, check the preview of the ingest channel.
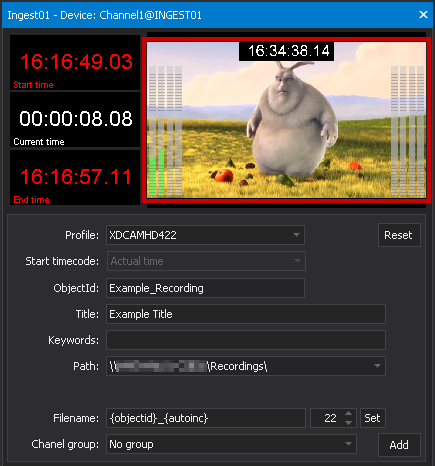
Figure: Ingest channel input signal preview
Notice
If the input signal is not displayed at all or is displayed incorrectly, make sure that the correct signal feed is provided to the Capturebox system.
-
Open the advanced ingest job settings by clicking the Create new job icon
 in the Ingest job list editing toolbar.
The Ingest job properties window is displayed.
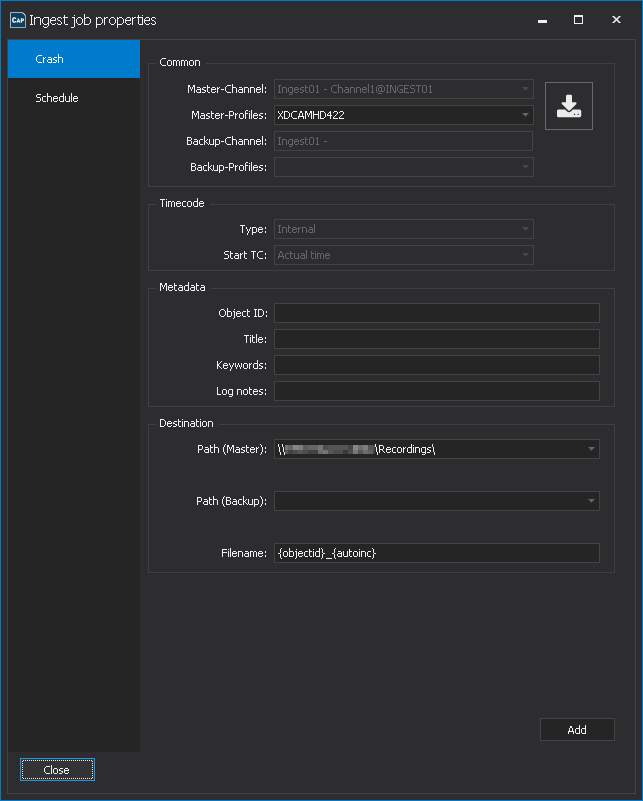
Figure: Ingest job properties window
-
As job type select Schedule.
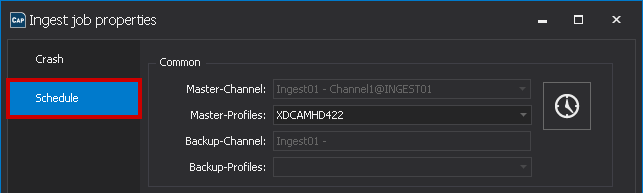
Figure: Select job type
-
(Optional) Enter the metadata to be used:
-
(Optional) Enter an Object ID.
Notice
If you do not enter a value in this field, the default value configured in the Capturebox system settings is used.
-
(Optional) Enter a Title.
Notice
If you do not enter a value in this field, the default value configured in the Capturebox system settings is used.
-
(Optional) Enter Keywords.
-
(Optional) Enter Log notes.
-
-
Select the Path where to store the recorded file.
-
(Optional) Enter a Filename.
Notice
This field displays the default value configured in the Capturebox system settings. If you do not want to use this, you can specify the file name manually. Note that you cannot add multiple ingest jobs with identical file names to the job list.
If the filename contains the variable
{autoinc}, it is usually not necessary to change the filename manually. Automatically incrementing the counter creates a unique filename for each ingest job, preventing existing files from being accidentally overwritten. -
Select the Start time and End time to be used.
Tip
As an alternative to entering the end time manually, you can enter the Duration of the job to be created in days (left field) as well as hours, minutes and seconds (right field). The values displayed under End time will adjust according to your entries.
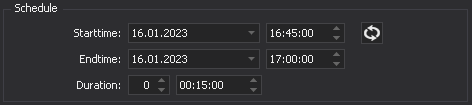
Figure: Ingest job scheduling
-
To create the ingest job, click Add.
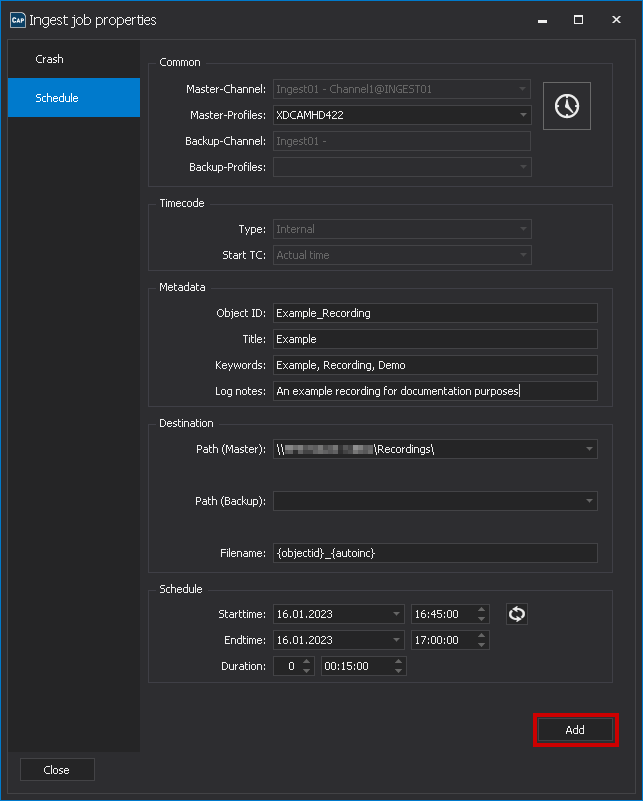
Figure: Add ingest job to job list
The ingest job is created using the previously selected settings, added to the job list, and prepared for recording.
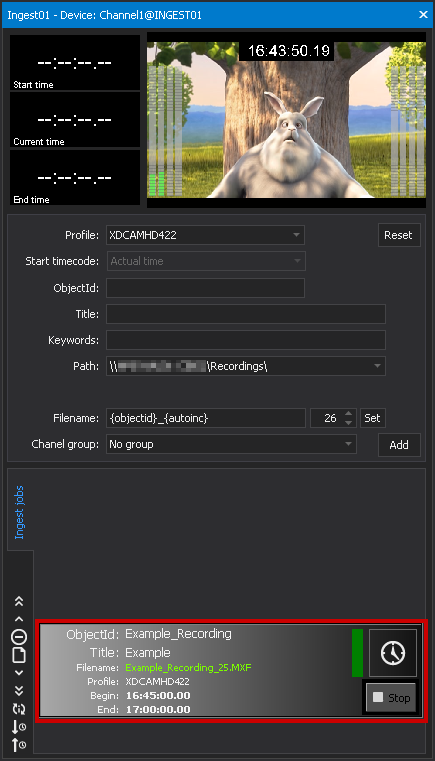
Figure: Ingest job created
-
Close the Ingest job properties window by clicking Close.
-
The recording starts automatically at the selected start time.
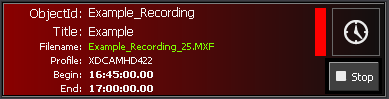
Figure: Ingest job started
Notice
The corresponding file is listed in the Media overview and highlighted in red, because it is a growing file. Provided that it is a supported file and container format (e.g. MXF), you can already play and view the file via the File preview.
Tip
To manually stop the recording before the scheduled end, click
 .
. -
The recording stops automatically at the specified end time.
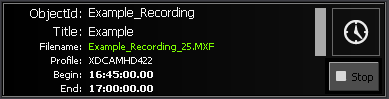
Figure: Ingest job completed
The recorded file is stored in the selected target directory and is listed in the Media overview. You can play and preview the file via the File preview.